Resolution
ELC - How to sync On-Prem AD Active Directory to Azure Active Directory with Azure AD Connect
Synchronizing users’ identities between local and cloud directories is a great way to let users access different resources on both on-premises and cloud environments with just a single set of credentials. To achieve that, you need to use Microsoft Entra Connect (Azure AD Connect) to integrate your on-premises Active Directory with Entra ID (Azure AD).
In this article, you will find some guidance on how to use Azure AD Connect to sync on-premises Active Directory with Microsoft Entra ID.
Azure AD Connect
Azure AD Connect is a tool that connects functionalities of its two predecessors – Windows Azure Active Directory Sync, commonly referred to as DirSync, and Azure AD Sync (AAD Sync). Azure AD Connect will be now the only directory synchronization tool supported by Microsoft as DirSync and AAD Sync are deprecated and supported only until April 13, 2017.
Before installation
Before starting the installation process, make sure that you:
- are on the server that will handle the synchronization
- checked all the prerequisites. You can find out more details here.
- downloaded Azure AD Connect. You can download it from this Microsoft’s website.
- have a verified domain in Azure Active Directory – non-routable domains (such as .local) may not sync properly.
NOTE: Instead of a non-routable domain, Microsoft recommends using a verified domain that seamlessly matches a verified domain in Office 365. If you have a non-routable domain see this article on how to fix it.
Installation
There are a few ways to install Azure AD Connect depending on your preferences. As the installation via Express Settings is perhaps the most commonly used scenario, I will use it as an example in this article. Express Settings is an option to go if you have a single-forest and use password synchronization.
NOTE: all actions below are performed on a test Office 365 environment.
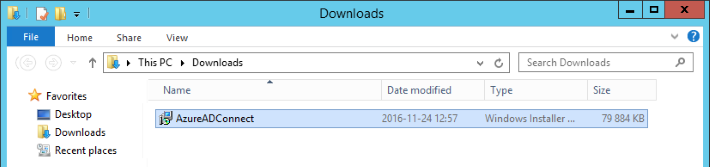
- Once you downloaded Azure AD Connect, navigate to Windows Installer Package (.msi) and double-click on the file.
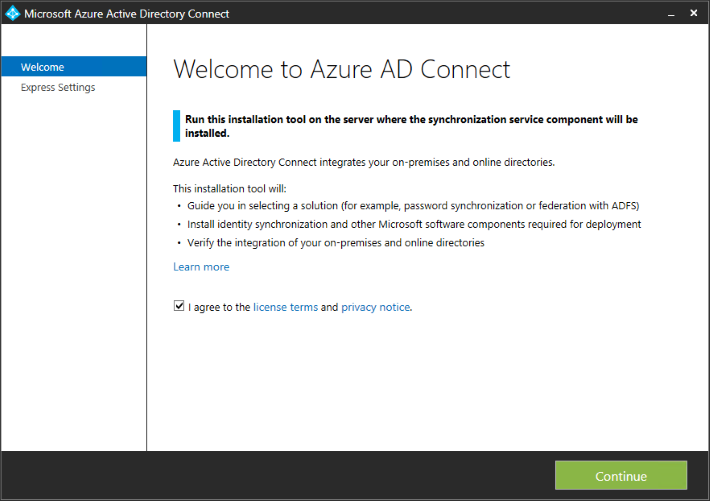
- In the Microsoft Azure Active Directory Connect wizard, agree to the license terms by checking the box. Click Continue.
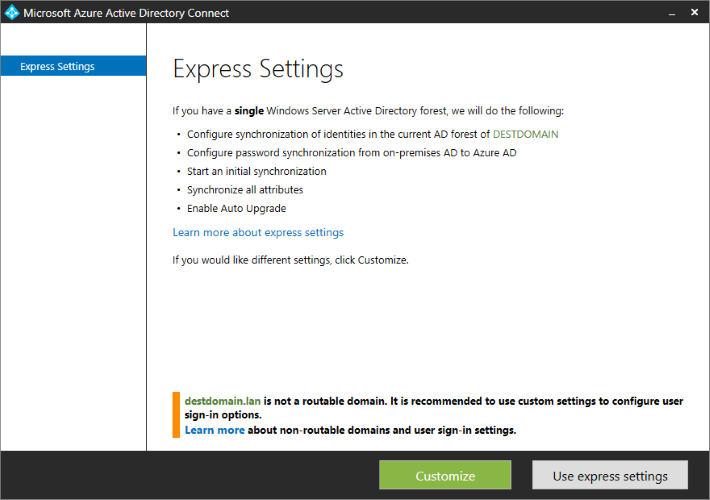
- If you have a verified domain, the Use Express Settings option will be highlighted to go with. Click on it to start the configuration. If you are using a non-routable domain, like .local, the wizard will recommend going with the Customize option.
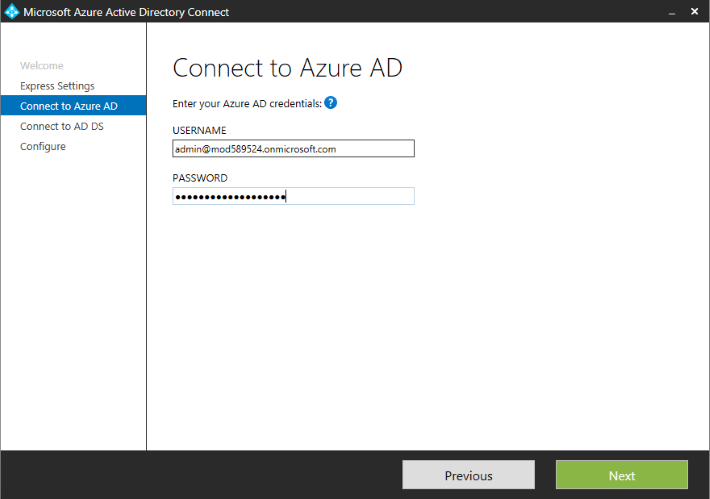
- In the resulting window, provide your Azure AD global administrator credentials. Click Next.
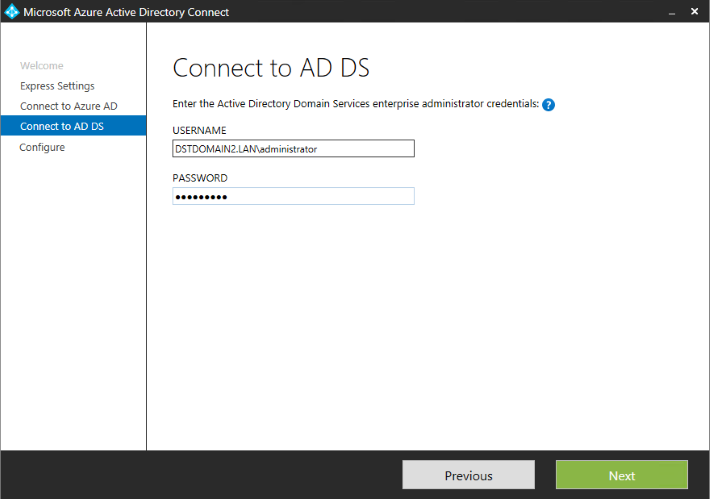
- Now, connect to AD DS using your enterprise administration credentials. Click Next.
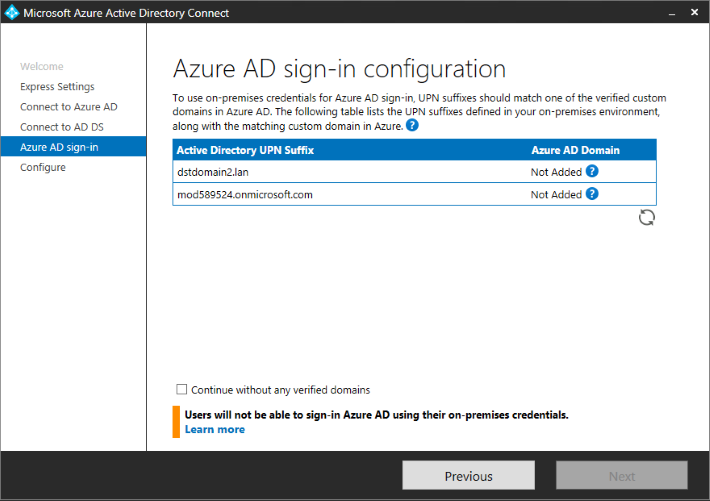
- If you didn’t add or verify your domain in Entra ID (Azure AD), you will see the Azure AD sign-in configuration section in the wizard. Make sure that you followed this instruction to add or verify the domain.
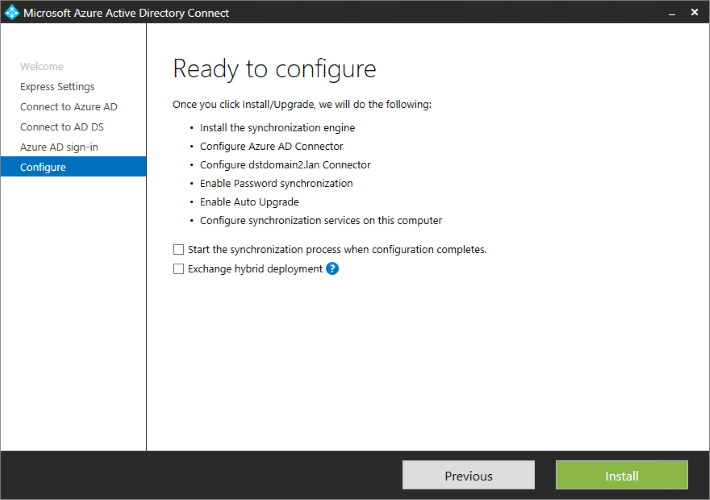
- In the Ready to configure window, you can put some final touches to the configuration by checking or unchecking available options. In this instruction, I do not want the synchronization to start automatically, so I unchecked the “Start the synchronization process when configuration completes” option.
- Install Azure AD Connect.
Use PowerShell to manage synchronization
If you unchecked the “Start the synchronization process when configuration completes” box in the Configure section in Azure AD Connect, you need to start the synchronization manually. You can do it via PowerShell.
Check current synchronization settings
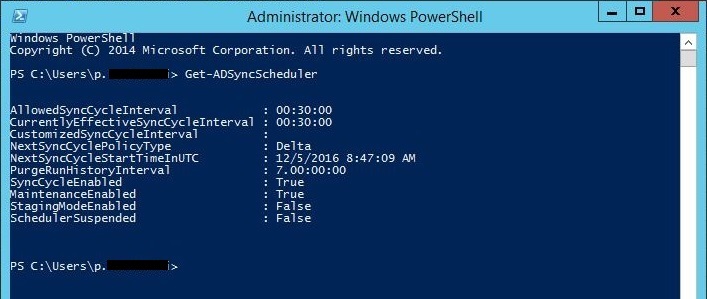
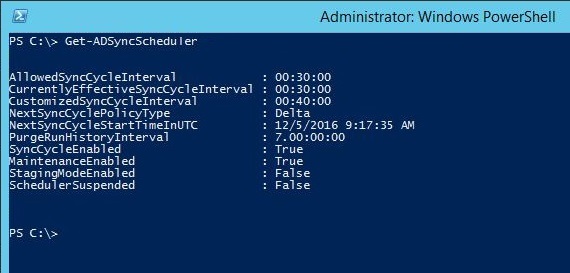
To check the current state of the synchronization settings, use this cmdlet:
Get-ADSyncScheduler
Manually start the synchronization
To start the initial synchronization run this cmdlet:
Start-ADSyncSyncCycle –PolicyType Initial

To start the delta synchronization use this cmdlet:
Start-ADSyncSyncCycle –PolicyType Delta

Customize the synchronization time intervals
To change the default 30-minute (00:30:00) sync cycle interval, execute the following cmdlet:
Set-ADSyncScheduler –CustomizedSyncCycleInterval 00:40:00
To customize the sync interval, use the HH:MM:SS format, e.g. 00:40:00 will set 40-minute sync cycle interval.

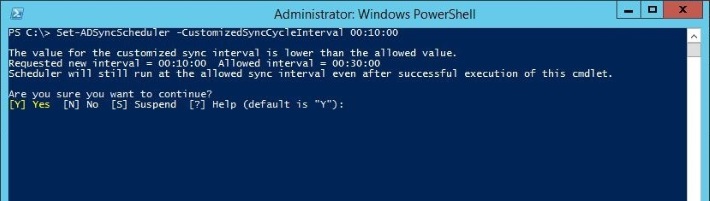
NOTE: Setting interval time under 30 minutes is not supported. This is what I get when trying to set up the customized interval to e.g. 10 minutes:
Run the Get-ADSyncScheduler cmdlet to check your settings. The time interval you set should appear next to the CustomizedSyncCycleInterval parameter.
Monitor the synchronization via Synchronization Service Manager
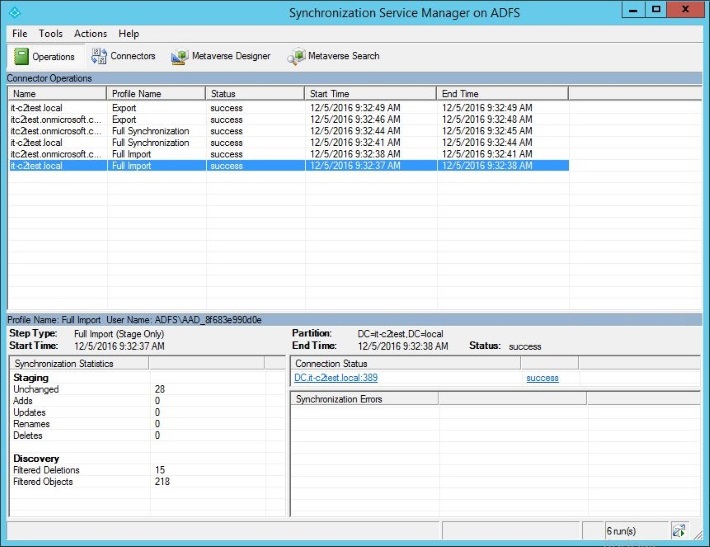
To monitor and manage directory synchronization, you can use the Synchronization Service Manager console:
- To open Synchronization Service Manager, go to Start menu and type Synchronization Service. It should appear under the Azure AD Connect.
- In the Synchronization Service Manager console, under Operations tab, you can monitor the synchronization progress. The upper part of the window shows ongoing sync cycles and the lower part presents what number of modifications is already synchronized.
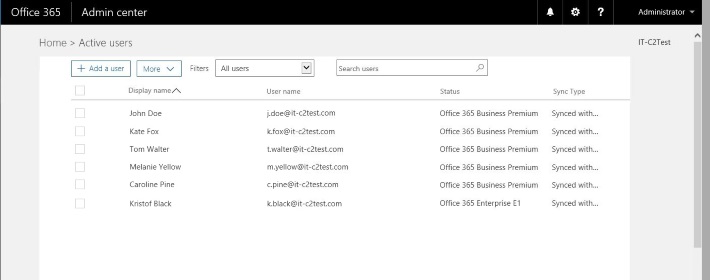
- Sign in to Office 365 portal.
- In Office 365 portal, go to Users >Active Users to see, which users are already synchronized with Entra ID (Azure AD).
Filter Organizational Units before synchronizing them to Entra ID (Azure AD)
If you need to limit the synchronization to only selected Organizational Units (OUs), you can use the filtering option in Azure AD Connect.
Important! Before adjusting any filter options, disable Azure AD Sync Scheduler. Thanks to that, you will not push any unwanted or not verified changes to Office 365. You can use the following cmdlet to disable the scheduler:
Set-ADSyncScheduler –SyncCycleEnabled $False
To enable the scheduler again, run the following cmdlet:
Set-ADSyncScheduler –SyncCycleEnabled $True
To filter Organizational Units:
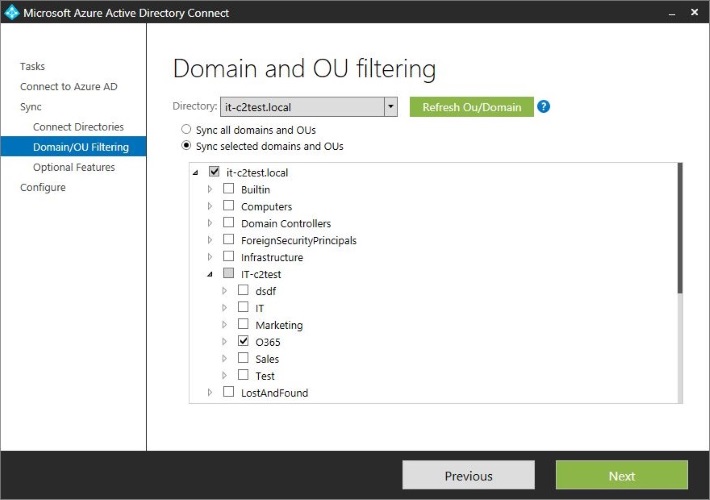
- Open Azure AD Connect.
- In the Domain and OU filtering section, unselect the OUs you don’t want to synchronize (by default all OUs are selected).
If for some reason you are not able to run Azure AD Connect wizard, you may filter Organizational units via Synchronization Service (although it is not a preferred method):
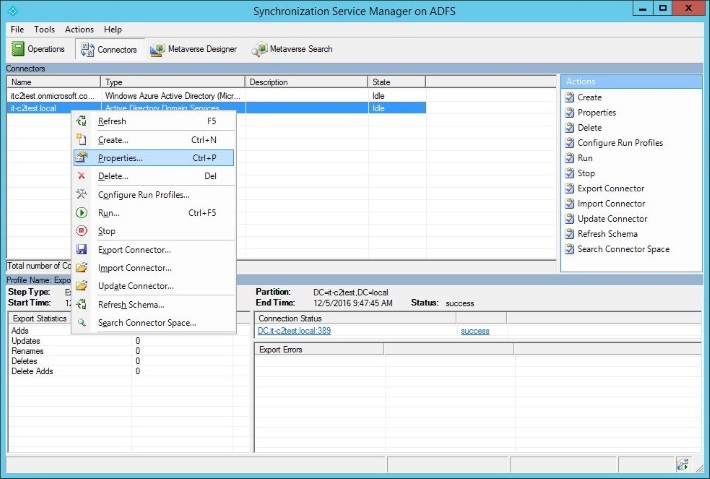
- Open Synchronization Service from the start menu.
- Go to the Connectors tab.
- Right click on the domain of Active Directory Domain Services type and select Properties.
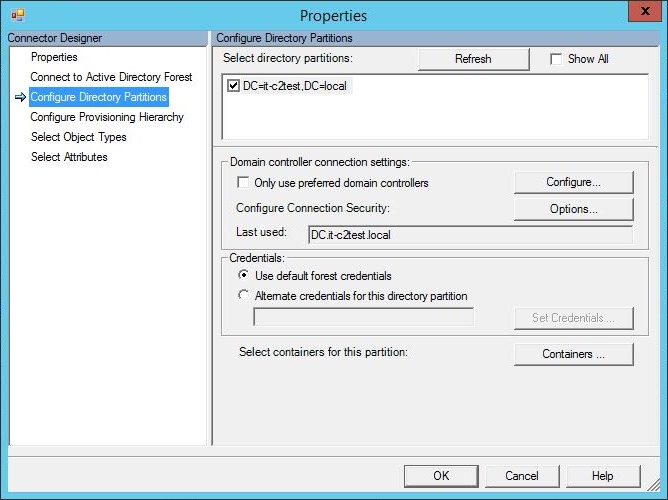
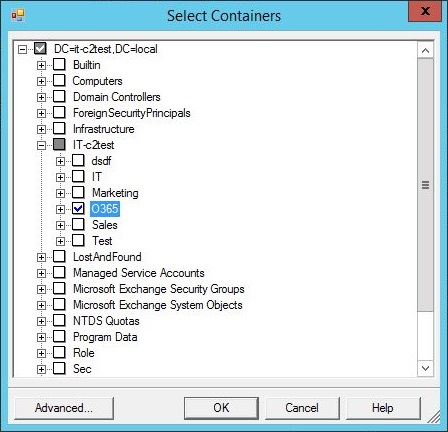
- In the resulting window, click on Configure Directory Partitions, select the domain in the Select directory partition section, and click Containers.
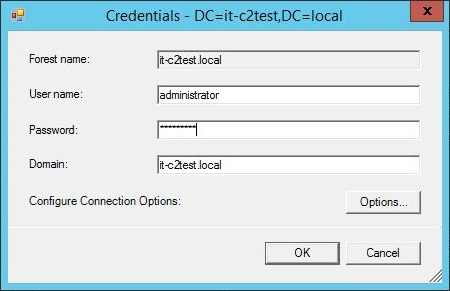
- Provide your admin credentials:
- Now you can unselect OUs you don’t want to synchronize to Entra ID. Click OK.
- As a final step of this configuration, Microsoft suggests to verify the changes before exporting them to Entra ID.
- After you verify your configuration and accept the changes, go to Connectors. Right click on Azure AD Connector, then click Run.
- In the Run Connectors dialog box, select Export.
- Now you can enable the Azure AD Sync Scheduler again. To start it, use the following cmdlet
Set-ADSyncScheduler –SyncCycleEnabled $Trueor Task Scheduler.
That’s it! Now you have local Active Directory synchronized with Azure Active Directory and all changes made to on-premises AD will be reflected in the Cloud, as per your settings.